
When concepting Make it to Midnight, one of our main focuses was asking “What can’t creators easily do?”, and using that to guide our thinking for new mechanics in an RRO. We’ve already talked about how this led to Data Tables and Room Progression, but another concept we wanted to facilitate creation for was custom melee weapons - and that means something creators have been asking for for a long time now - Go-karts! Uhh, no wait, a Swing Handle! This means no more clamping shapes to swords just to get a good cross-platform experience!
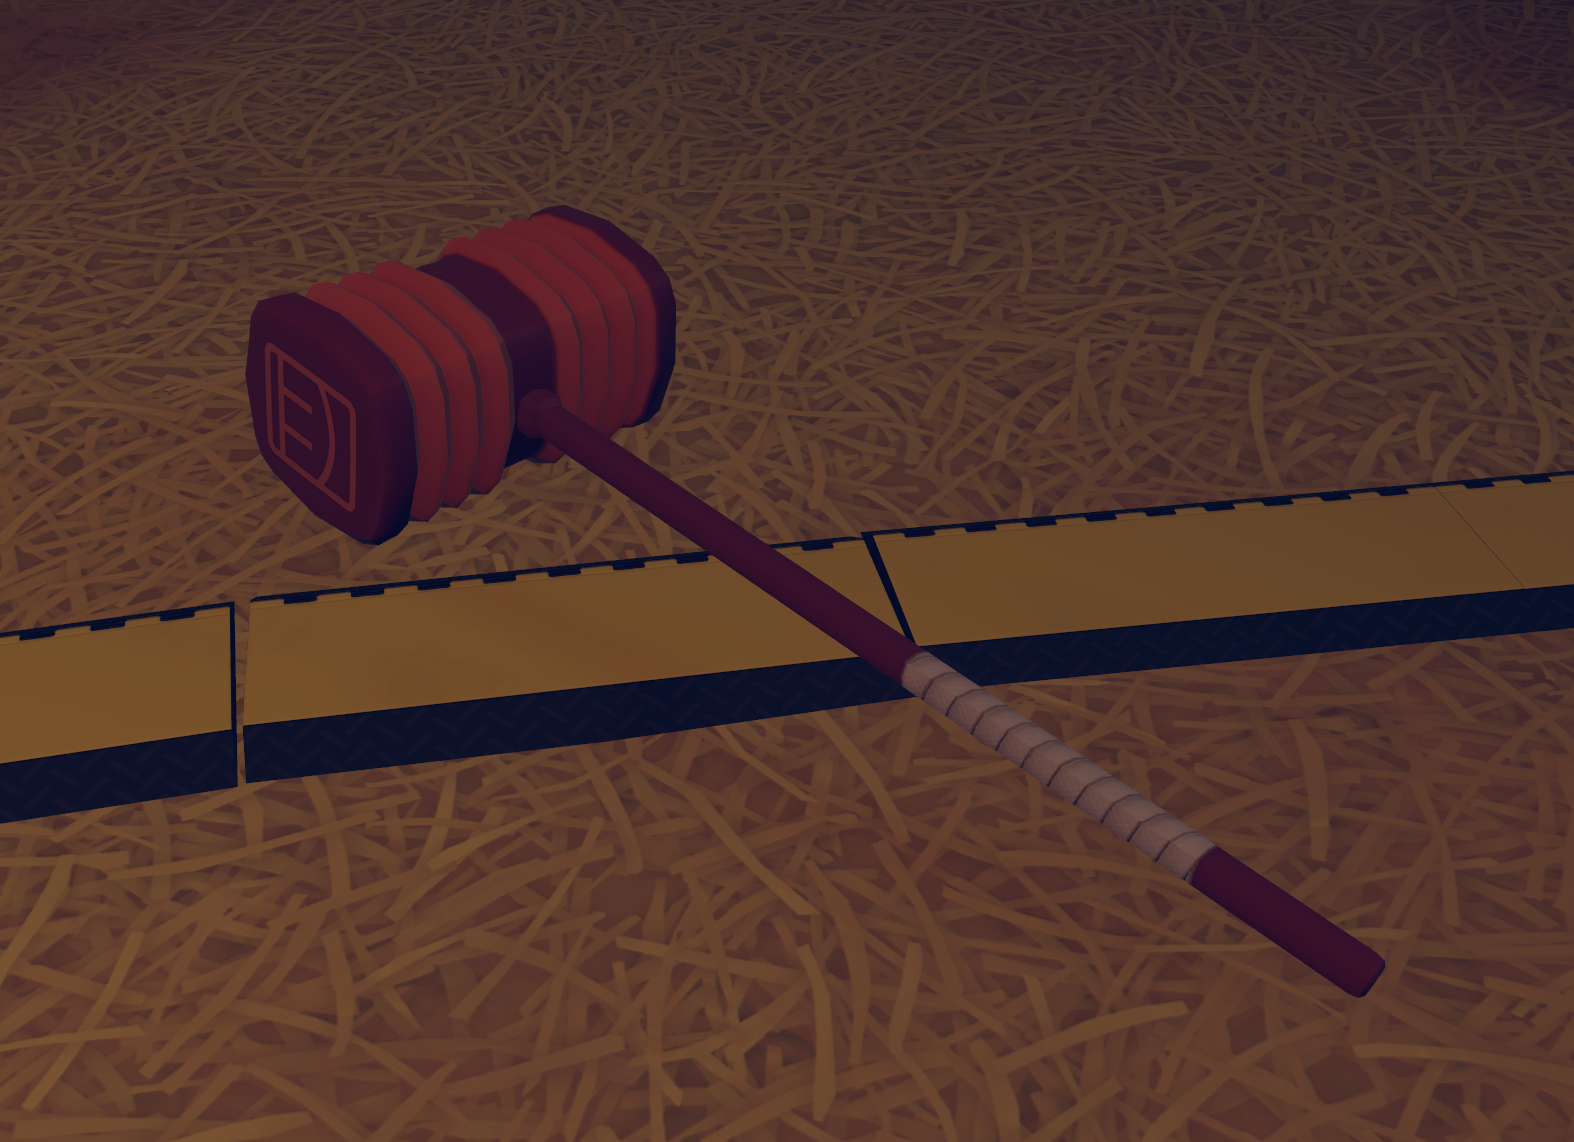
You’ve probably already seen the Swing handle through Bonky’s hammer in Make it to Midnight. And to make this hammer feel the best it can, we had to make a few other components too so that creators can make RRO-quality custom melee weapons.
Specifically, the new CV2 features that went in to making custom melee weapons a reality were:
Swing Handle
Collision Detection Volume
Motion Trail
New velocity chips
Handle haptics
Emulating an RRO Weapon
One of our core goals with custom melee weapons was that creators would be able to easily hook up our components to create something that feels as good as, if not better than, our existing RRO melee weapons. To help with this, we broke down everything existing RRO weapons could do (the list was surprisingly long), and capture that behavior in a completely customizable way. This resulted in three core components - the Swing Handle, the Collision Detection Volume, and the Motion Trail.
With these components, you can set up your own custom melee weapon as simply as this:
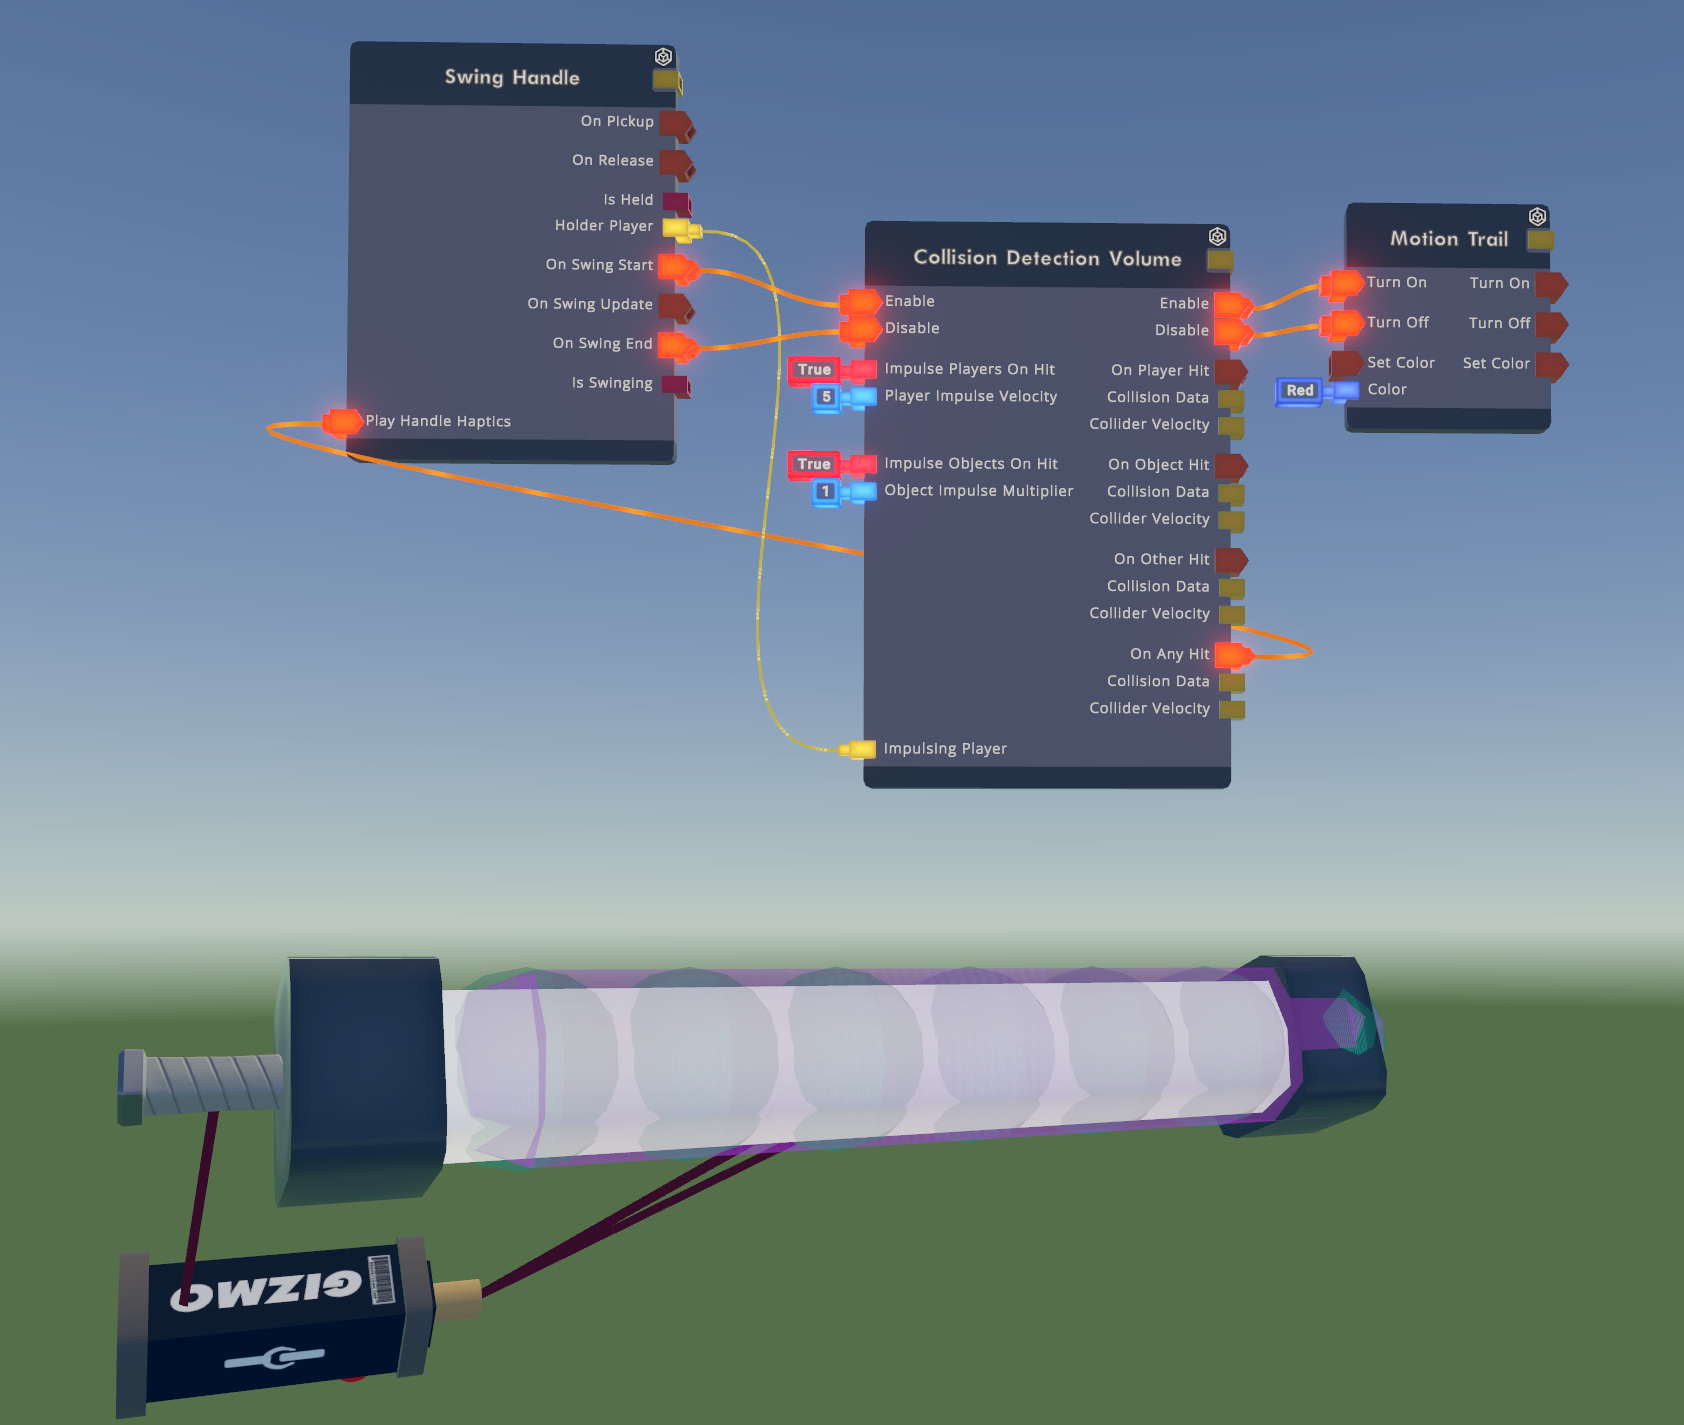
This default setup will behave just like an RRO melee weapon and will have a good default impulse for hitting players and objects. If you want to try it out for yourself, just copy the above screenshot and have fun!
If you want to know more about the individual components, the Motion Trail component has been out for a while already, so let’s dive into the new Swing Handle and Collision Detection Volume.
Swing Handle
The Swing Handle, like our RRO swords, detects swings by clicking for screens players and by physical motion for VR players. The swing for screens players supports all of the animations from our existing RRO weapons, as well as a new animation, “Pickaxe,” that we hope players will find useful.
Charged attacks for screens players work on Swing Handles, however unlike RRO weapons they no longer move the player forward. If you want to add something like that functionality back, once we ship custom locomotion you’ll be able to apply velocity to the player when they start a swing.
Swing Handle - Aim Assist
One new exclusive feature of the Swing Handle is Aim Assist for Gamepad and Touch players, which is enabled by default. In order for creators to be able to use the Swing Handle to build high quality PvP games with melee weapons, we wanted to make sure that players on all platforms were able to easily chase and target other players when holding the Swing Handle.
This was an issue we ran into while initially implementing Bonky’s hammer in Make it to Midnight. Before we decided to add aim assist, it was very hard to hit other players on mobile. To remedy that, we reused and retuned our existing Aim Assist for RRO ranged weapons to support melee aim assist for the Swing Handle too. Before the Swing Handle leaves beta, creators will be able to customize who these features target.
Collision Detection Volume
Another important consideration for melee weapons was that melee hits should feel fun and realistic, both against players and objects. The first step of that was detecting collisions accurately, and what we had at the time, Trigger Volume, wasn’t very good for this purpose.
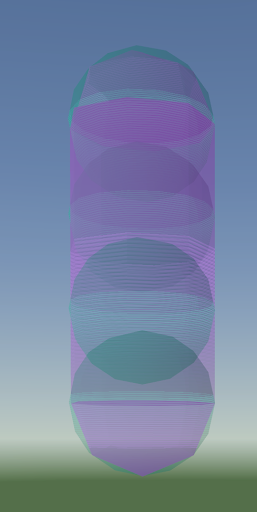
Trigger Volumes aren’t as reliable when they’re moving, and they don’t provide as much useful data on what they hit. This led us to creating the Collision Detection Volume, a new component that uses a series of spherecasts to detect collisions and provide meaningful data. This is why when you spawn the component in-game, you’ll see a capsule with several spheres inside of it - the spheres are what actually detect collisions.
Placing a Collision Detection Volume Component
When you first place down the Collision Detection Volume component, it might feel a bit weird. We recommend turning on the Show Selection Bounds makerpen setting when placing a Collision Detection Volume component if you have it turned off, as it will help you understand how the placement works.
We have lots of props that scale uniformly, like our existing melee weapons, and we have other components that are deformable, meaning they can scale along a singular direction, like the trigger volume for example. Because it has to be a uniform capsule, the Collision Detection Volume component is the first of its kind that is semi-deformable. As a capsule, scaling along the X or Z axis will scale both axes uniformly because it’s scaling the radius. The height can be scaled separately from the radius.
Due to performance reasons and maintaining a stable ink cost for the component, we limited the amount of inner spheres to 8 (at least for now). Because of this, the ratio of the height of the capsule to its diameter can currently be a maximum of 8:1.
Collision Detection Volume - Hit Events
At its core, the Collision Detection Volume component is composed of four events that output a Collision Data and the velocity of the specific sphere in the collider that hit:
On Player Hit - fires when hitting any player.
There is also a corresponding event for this in the Player Definition Board
If it is part of a hierarchy (e.g. clamped to a Swing Handle), it will not detect hits with the player holding the hierarchy (or seated in it, in the case of a seat or vehicle)
On Object Hit - fires when hitting any object.
If the held object’s hierarchy is held by a player, the output Collision Data will contain both the object hit and the holding player.
If it is part of a hierarchy (e.g. clamped to a Swing Handle), it will not detect hits with other objects in the same hierarchy
On Other Hit - fires when hitting any non-makerpen-selectable object, like the white scene geometry in a Rec Room Studio room or the ground in a copy of ^Park.
On Any Hit - fires when any of the above three fire, with the exact same data
These all internally manage their own cooldowns. For example, you won’t get a Player Hit event every single frame that the player is inside the collision detection volume, meaning you can easily rely on this to hook up a damage system.
For performance reasons, a Collision Detection Volume component will not detect hits when it isn’t moving unless you specifically toggle a setting in its configuration to allow for this.
Collision Detection Volume - The Object Board
Since we want this to be a core building block for custom melee weapons (though we expect players will find plenty of other uses for it as well), we wanted to make sure hitting something feels significant, and that meant implementing a fun and fully customizable default audio and impulse (applying velocity) on hits. Through much iteration, we now have the current largest default object board of all of our CV2 components.

The default impulse for hit objects is based on the speed of the collision. When we tested hitting props in VR, this is what felt the most natural as it supports variation in impulse between hitting an object slowly or quickly. You’ll notice a new chip in the object impulse section - Request Velocity Set Over Duration.
In our own testing while iterating on these default impulses, one of the issues we noticed was that the physical geometry of a custom sword would interfere with the impulse from the Collision Detection Volume, and half the time a collision just wouldn’t feel right in VR. Our RRO swords, as well as rally buggies, reapply their collision impulses over the course of a few frames, and we wanted to mimic that here. This new chip lets us continuously set the velocity for a fraction of a second after the hit, to make sure that the sword’s physical geometry doesn’t get in the way.
You’ll notice some other new chips in the section of the object board for hitting a player too:
Vector3 Inverse
Vector3 Project on Plane
Player Get Is Grounded
Velocity Add (New)
The first three chips were important for us to get a good default direction for hitting players. Objects get hit in the direction of the hit itself, but players get hit away from the holding player (if the Collision Detection Volume is part of a held tool). We also wanted to make sure that players didn’t just get impulsed into the ground, especially if they’re on a slope, so we make sure that the hit always goes just a tiny bit “up” in addition to “forward”.
One thing we noticed in early versions of Make it to Midnight is that hitting a player didn’t feel good when it took a few seconds to see them get pushed away. To account for this, we added a new chip Velocity Add (New). This chip simulates the velocity change immediately when it is applied to remote players, and will eventually replace the current Velocity Add chip. This is what allows hammer hits to feel so responsive in Make it to Midnight, and we actually use the same system for our rally buggies on this one as well!
We look forward to seeing what you create with these new features! If you have any questions about how to use them or want to show off what you’ve done with them, feel free to post in our Discord!
To see dev blogs for other features that we added while working on Make it to Midnight, check out our posts on Data Tables and Room Progression. There’s also one major feature Make it to Midnight uses that we’re still working on before it’s ready for creators–Custom Locomotion! Look forward to seeing that in the new year!


